
Run the demo VM on VirtualBox
VirtualBox is the easiest cross-platform way to try SocTalk on a desktop, free, GUI-driven, and available on Windows, Linux, and Intel macOS. This guide imports the published demo image and boots it. Validated on VirtualBox 7.0.
This path is for evaluators and demos: for a production install on your own cluster see Install.
Apple Silicon (M-series) Macs
The demo image is x86-64, which VirtualBox can't run on Apple Silicon. On an M-series Mac, use a cloud launch or another host. VirtualBox here means Windows, Linux, or an Intel Mac.
Prerequisites
- VirtualBox 7.0 or newer.
- ~3 GB free disk for the converted image.
- An SSH key pair (
~/.ssh/id_ed25519.pubin the examples) to read the setup token over SSH.
1. Download and decompress the image
Grab the vmdk from the Downloads page (VirtualBox's VMware-compatible format):
VER=0.2.1
curl -L -O https://github.com/soctalk/soctalk/releases/download/v$VER/soctalk-demo-$VER.vmdk.xz
curl -L -O https://github.com/soctalk/soctalk/releases/download/v$VER/SHA256SUMS.txt
sha256sum -c SHA256SUMS.txt --ignore-missing   # macOS: shasum -a 256 -c
xz -d soctalk-demo-$VER.vmdk.xz
2. Convert the vmdk to VirtualBox's native VDI
The released vmdk is streamOptimized (a read-only VMware/OVA layout), which VirtualBox won't boot as a writable disk. Convert it once to a VDI:
VBoxManage clonemedium disk soctalk-demo-0.2.1.vmdk soctalk-demo-0.2.1.vdi --format VDIThis produces a writable, dynamically-sized soctalk-demo-0.2.1.vdi (a few GB on disk). VBoxManage ships with VirtualBox, on Windows it's in C:\Program Files\Oracle\VirtualBox\.
3. Build a cloud-init seed ISO
A small NoCloud seed ISO creates an ops user with your SSH key so you can read the per-boot setup token. If you skip it you can still log in as the build-time ubuntu:packer user (see SSH access), but that credential is in the public source tree, so harden the VM before exposing it. On Linux/macOS:
cat > user-data <<EOF
#cloud-config
users:
  - name: ops
    sudo: ALL=(ALL) NOPASSWD:ALL
    shell: /bin/bash
    ssh_authorized_keys:
      - $(cat ~/.ssh/id_ed25519.pub)
EOF
printf 'instance-id: soctalk-demo\nlocal-hostname: soctalk-demo\n' > meta-data
# Linux: genisoimage / cloud-localds   •   macOS: hdiutil or mkisofs (brew install cdrtools)
genisoimage -output soctalk-seed.iso -volid cidata -joliet -rock user-data meta-data
4. Create the VM
Open VirtualBox and click New.
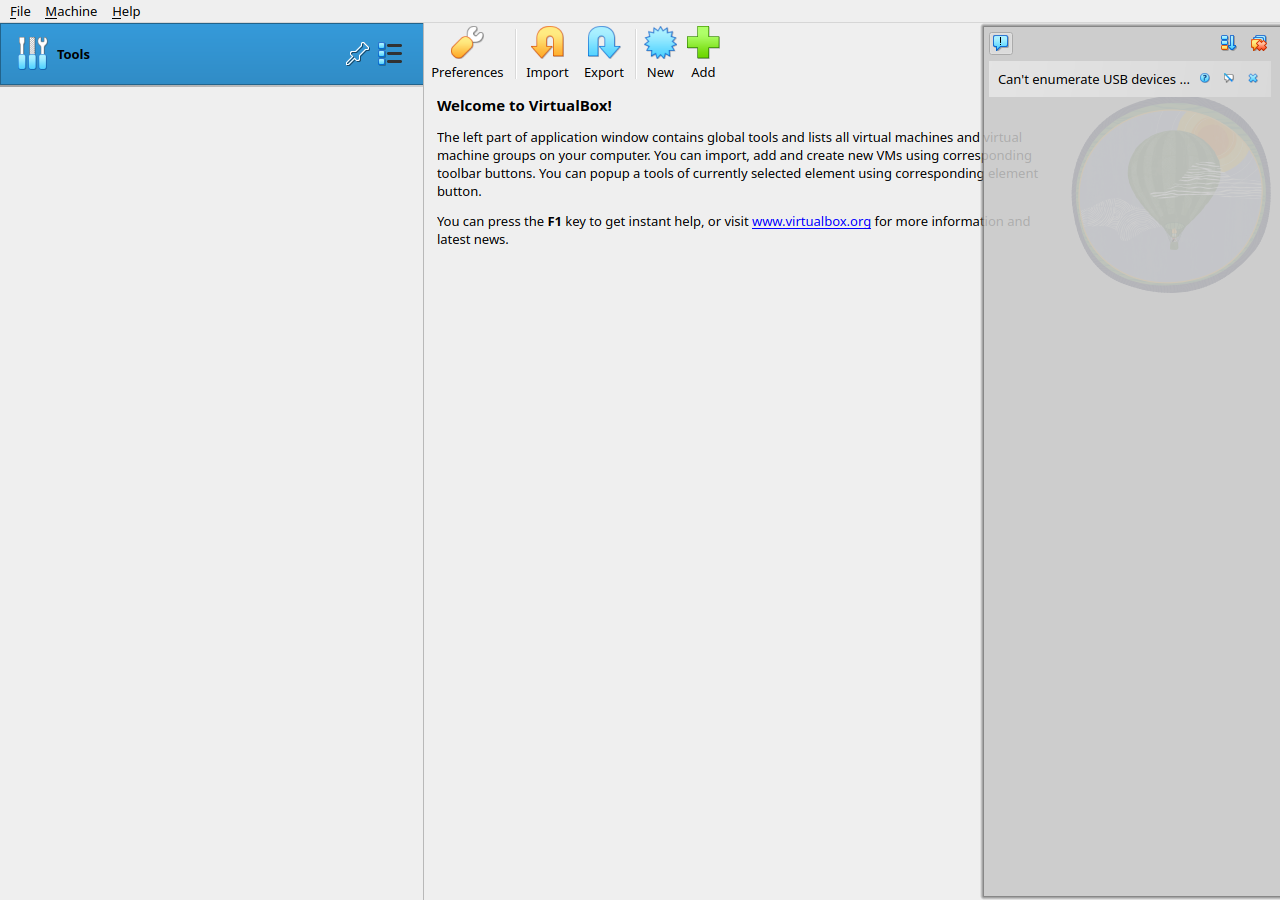
Name and Operating System: name it soctalk-demo, set Type to Linux and Version to Ubuntu (64-bit). Leave the ISO empty:
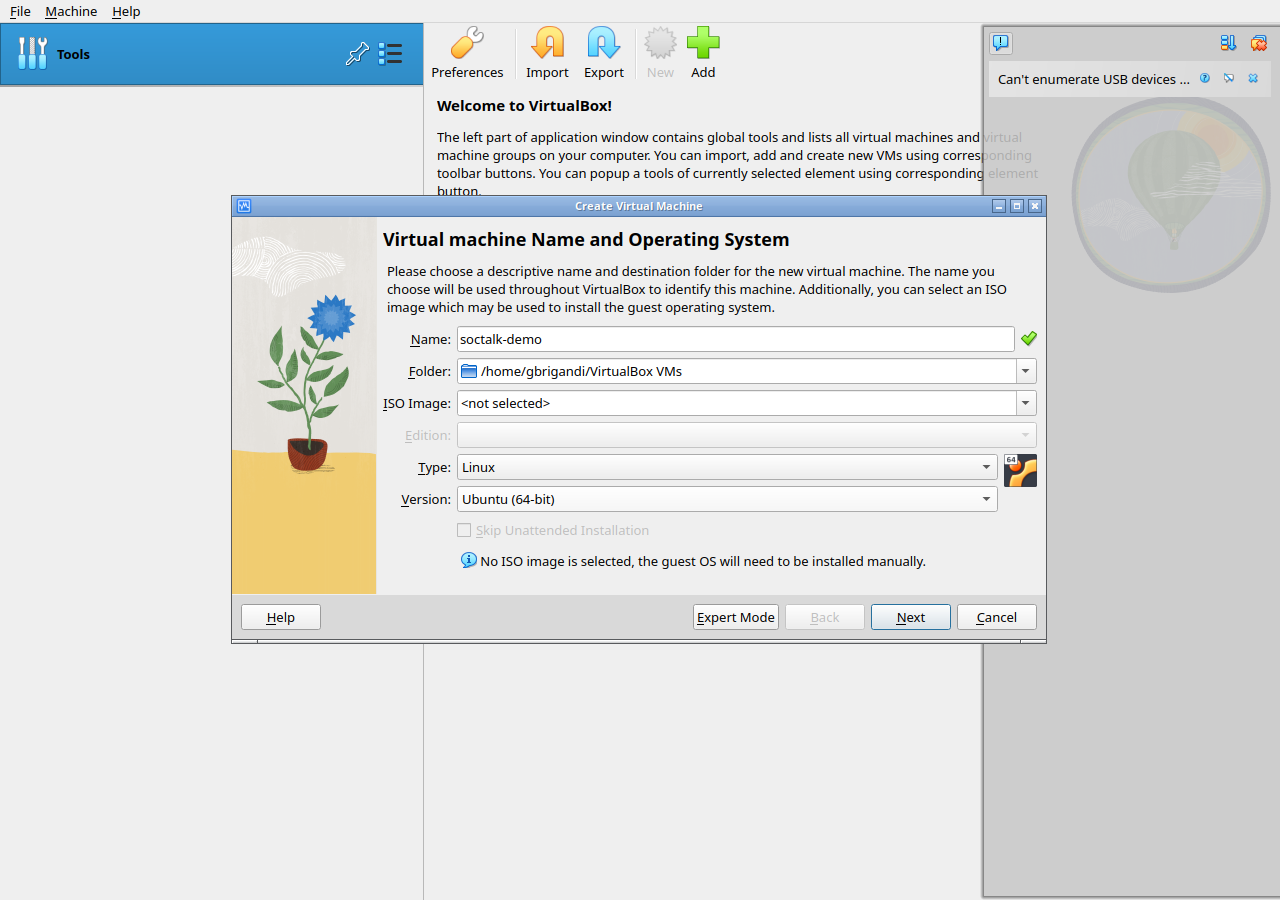
Hardware: give it 8192 MB of memory and 4 CPUs (sizing minimum is 4 vCPU / 8 GB; the Wazuh stack needs the RAM):
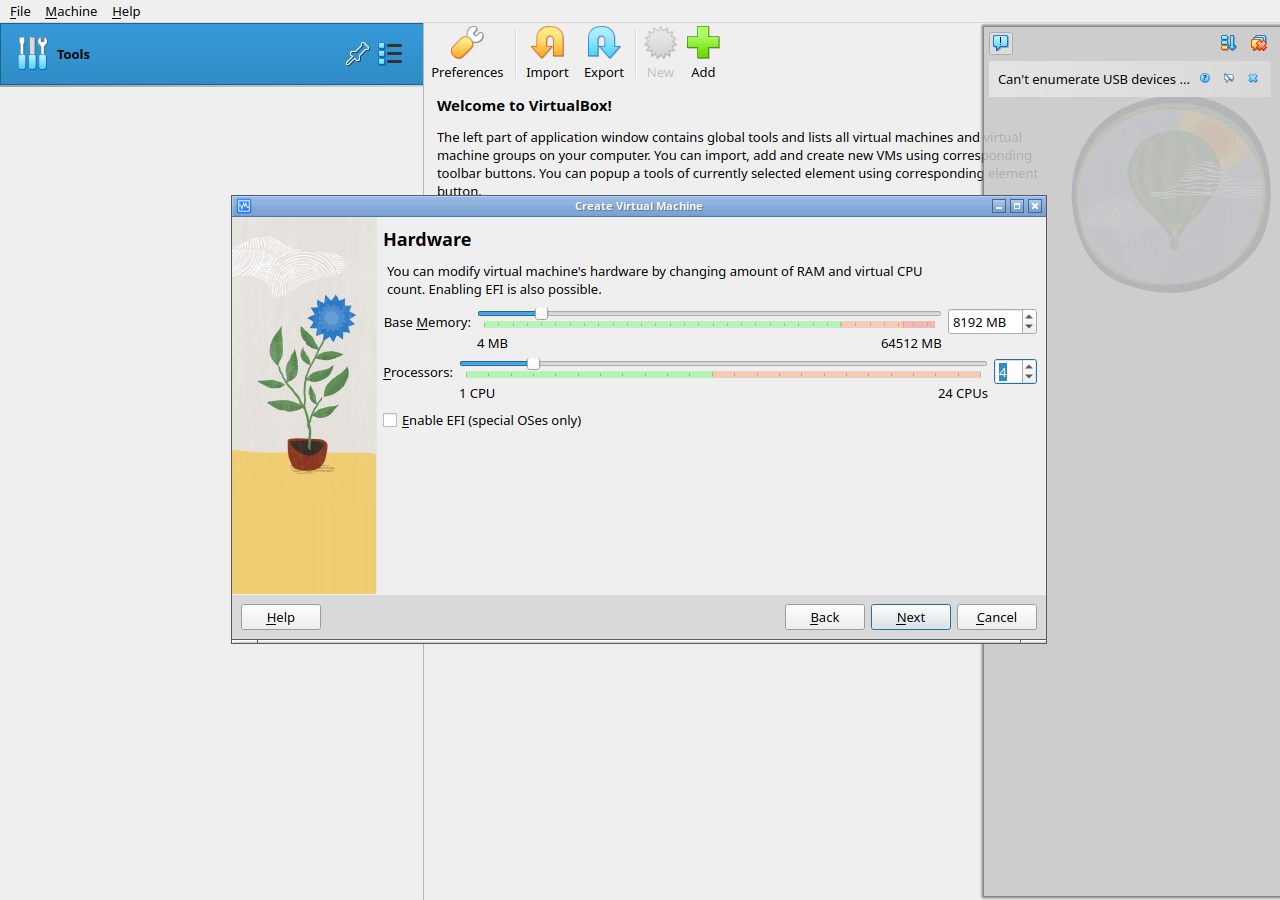
Virtual Hard disk: choose Use an Existing Virtual Hard Disk File and select the soctalk-demo-0.2.1.vdi you converted:
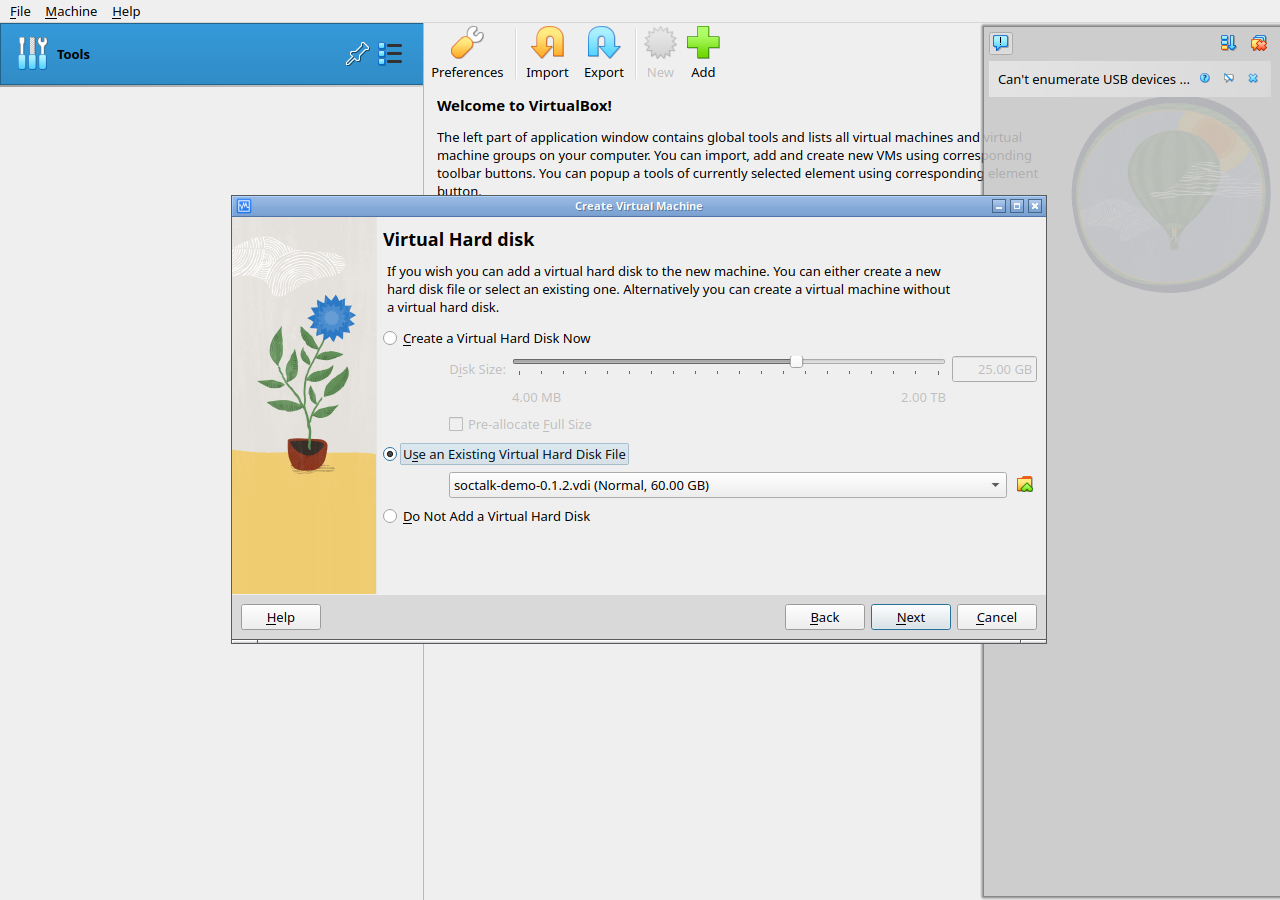
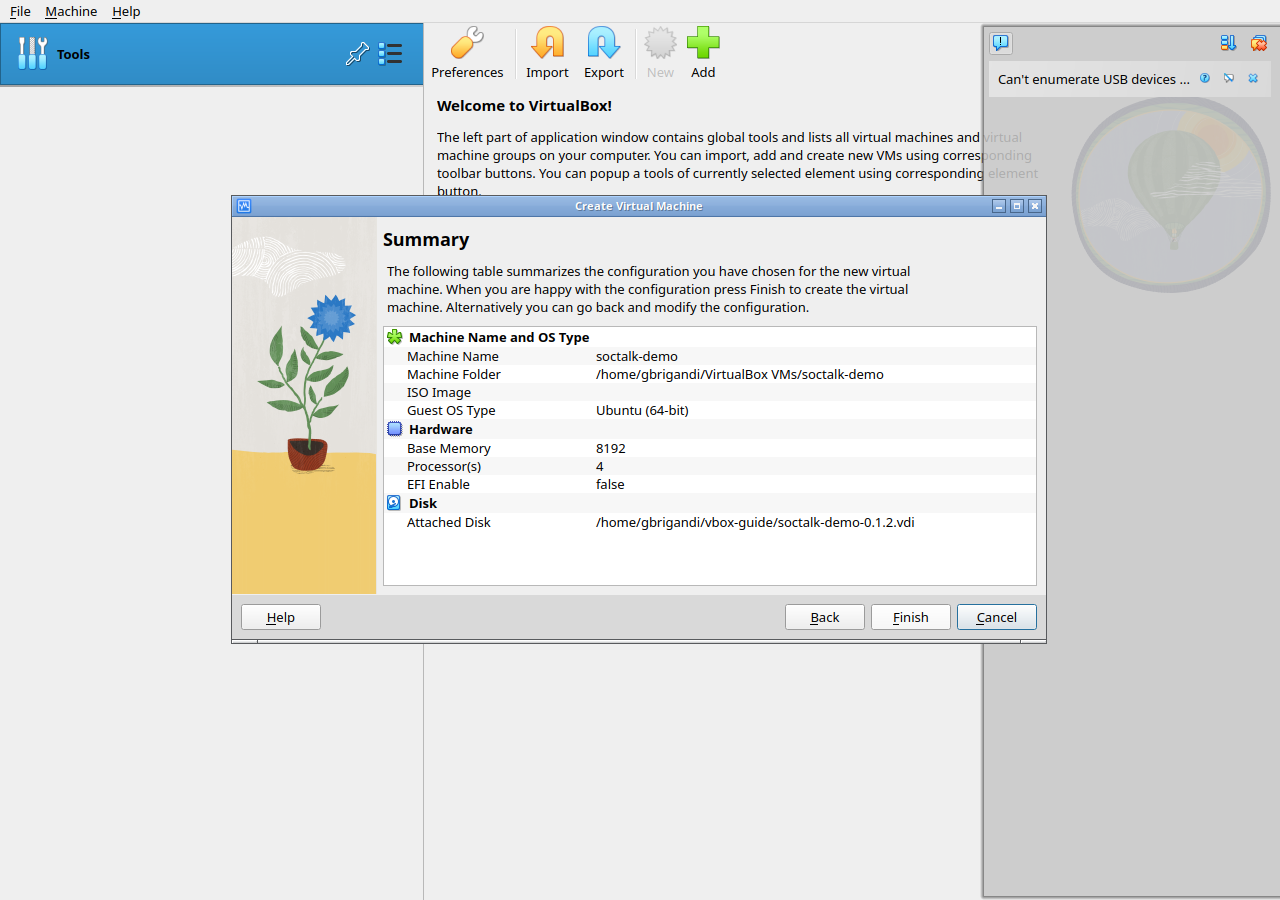
Summary: confirm the settings and click Finish:
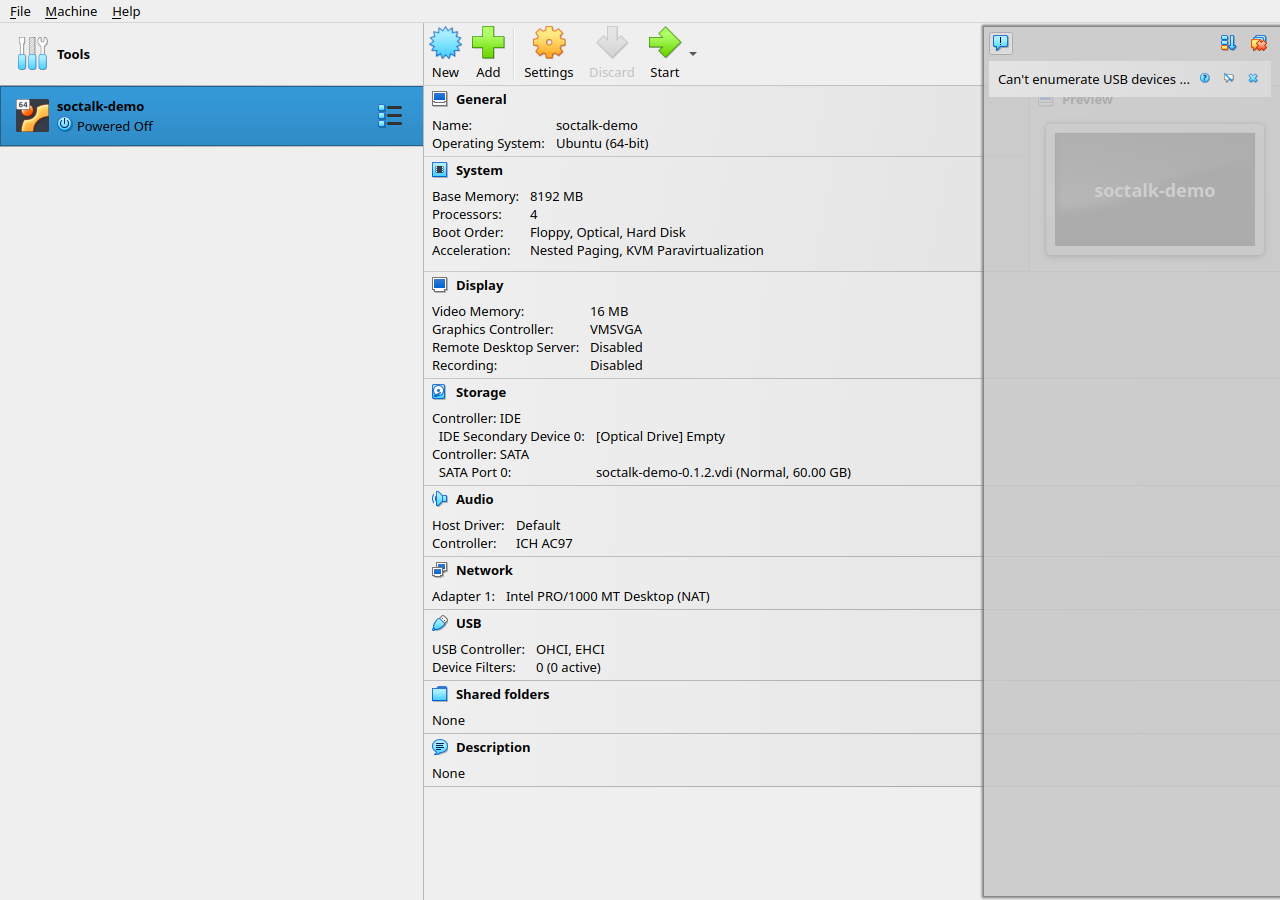
The VM appears in the Manager with the VDI on its SATA controller:
5. Attach the seed ISO and set networking
Select the VM and click Settings.
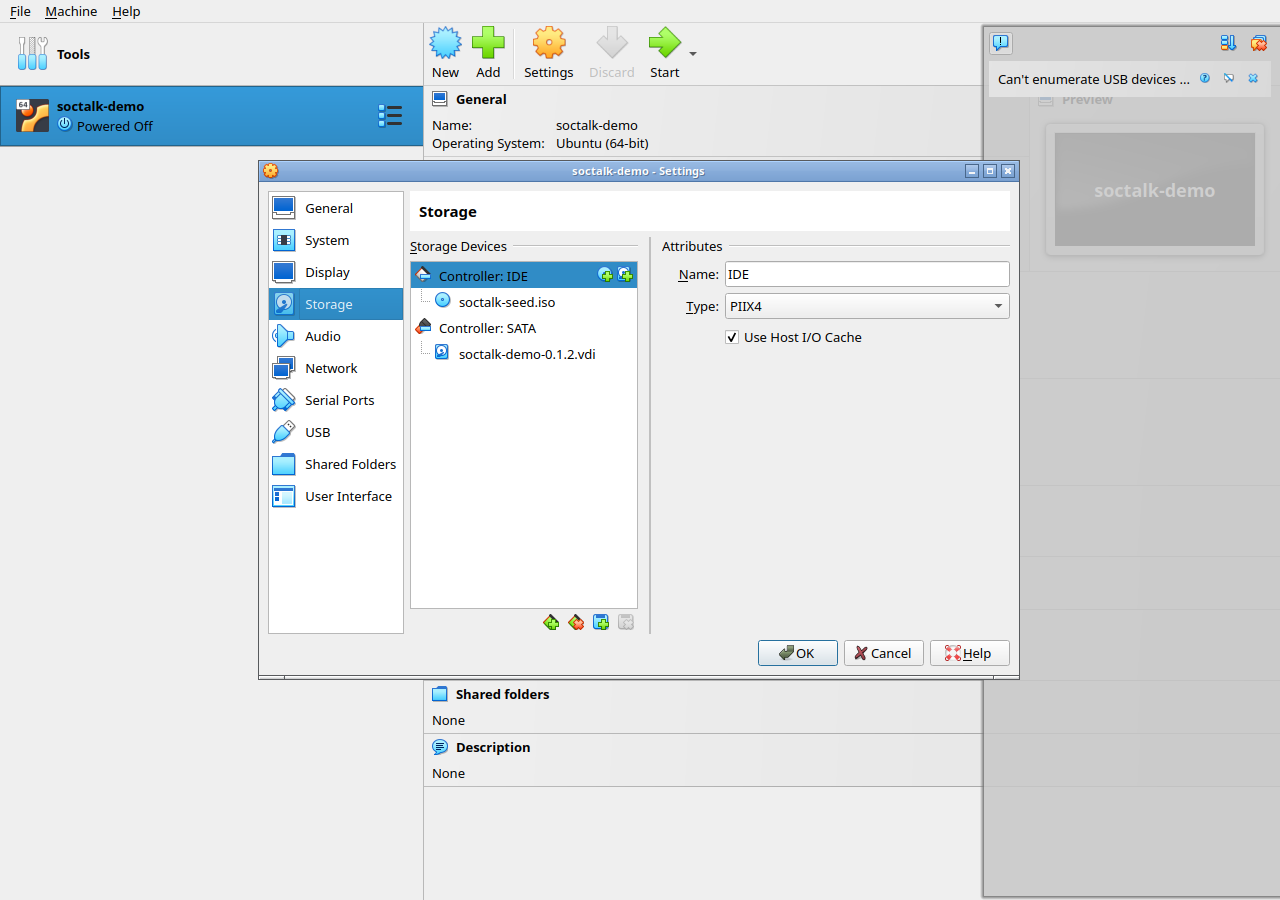
Storage: under the IDE controller, click the optical drive and choose your soctalk-seed.iso (click the disc icon → Choose a disk file). The VDI is already on SATA:
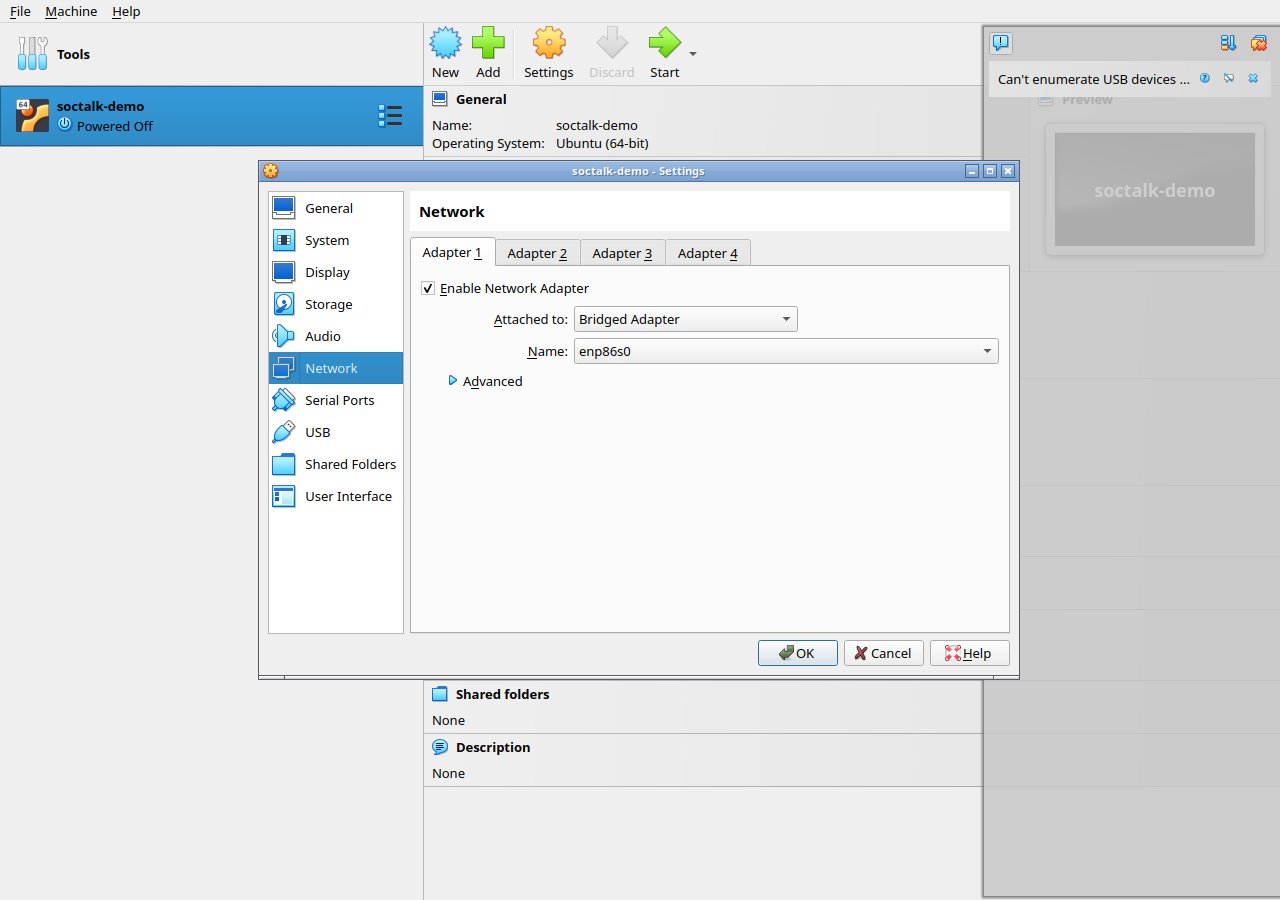
Network: set Adapter 1 → Attached to: Bridged Adapter so the VM gets an IP on your LAN and you can reach the wizard directly:
Click OK.
NAT instead of bridged
If you can't use bridged (e.g. a restricted network), leave the default NAT and add Port Forwarding rules under Network → Advanced (host 8443 → guest 8443 for the wizard, host 8080 → guest 443 for the UI), then use localhost instead of the VM's IP below.
6. Start and find the VM's IP
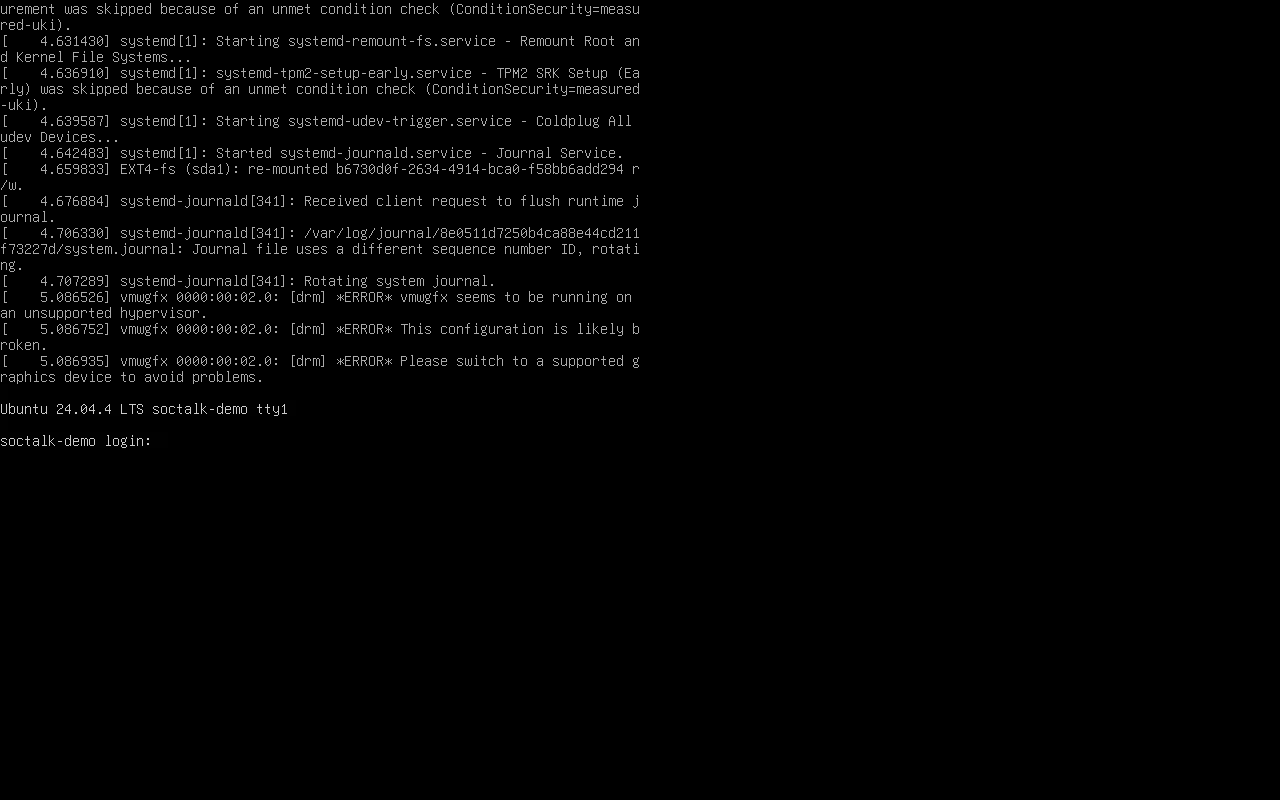
Click Start. The console boots to a login prompt:
Find the VM's bridged IP, from your router's DHCP leases, or by matching the VM's MAC:
VBoxManage showvminfo soctalk-demo | grep "MAC"      # note the MAC
arp -an | grep -i <mac>                               # find the matching IP
7. Run the wizard and sign in
Read the per-boot setup token over SSH, then drive the wizard:
ssh ops@<vm-ip> sudo cat /var/log/soctalk-setup-tokenBrowse to https://<vm-ip>:8443/, accept the self-signed certificate, paste the token, and fill in the wizard (field reference). After submit, the first-boot installer runs helm install and onboards the demo tenant, about 2 minutes for the soctalk-system pods, then a few more for the demo tenant's Wazuh stack:
ssh ops@<vm-ip>
journalctl -u soctalk-firstboot -f
sudo kubectl --kubeconfig /etc/rancher/k3s/k3s.yaml get pods -A
Then browse to https://<vm-ip>/ (port 443, not 8443), sign in with the wizard's admin credentials, and continue with the MSSP UI Tour. If you left the hostname blank in the wizard, map soctalk.local to the VM IP in your hosts file and use https://soctalk.local/.
8. Tear down
VBoxManage controlvm soctalk-demo poweroff
VBoxManage unregistervm soctalk-demo --delete
VBoxManage closemedium disk soctalk-demo-0.2.1.vdi --delete
Troubleshooting
| Symptom | Check |
|---|---|
| VM won't start: "cannot open … streamOptimized" / disk read-only | You attached the raw .vmdk. Use the converted .vdi from step 2 |
| Won't run on an Apple Silicon Mac | Expected, the image is x86-64; use a cloud launch instead |
Console shows vmwgfx … unsupported hypervisor errors | Harmless, VirtualBox's emulated GPU; the appliance is headless and boots fine |
| VM has no IP on bridged | Pick the right host NIC in Network → Name; confirm your LAN has DHCP. Or use the NAT + port-forwarding option above |
| Can't read the token (no SSH) | The seed ISO isn't attached (Storage → IDE) or its key is wrong; re-check step 3/5 |
| Anything past the wizard | Same as every platform, see the Quickstart troubleshooting table |