
Run the demo VM on VMware ESXi
Import the published soctalk-demo-<ver>.vmdk into VMware ESXi and boot it. This guide covers ESXi 7/8 with the built-in Host Client (the browser UI). If you're running Fusion or Workstation on a laptop instead, the flow is nearly identical; import the same vmdk via File → Open.
This path is for evaluators and demos running SocTalk on their existing on-premise ESXi. For a production install on your own Kubernetes cluster, see Install. Validated on ESXi 8.0.3 (build 24677879) with Host Client 2.x.
Prerequisites
- ESXi 7.0 or newer with an existing user datastore (VMFS). If you don't have a datastore yet, the New datastore section below walks it.
- Root or a user with the
Virtual machine.Provisioning.Deploy from templateprivilege. - A port group (usually the auto-created VM Network) that has DHCP + outbound HTTPS.
- ~10 GB free on the datastore (the vmdk is ~800 MB streamOptimized but converts to a 60 GB thin VMFS disk that grows on demand).
- An SSH key pair (
~/.ssh/id_ed25519.pubin the examples) to read the setup token over SSH.
You need an actual VMFS datastore, not the ESXi OSDATA volume
ESXi's installer creates an OSDATA-* volume on the boot disk. It shows in esxcli storage filesystem list and mounts under /vmfs/volumes/, but it is not a normal user datastore and VMs stored on it fail to power on with msg.vmx.poweron.failed: not on NAS or VMFS version 3 datastore. Add a separate disk or partition and format it as VMFS before continuing.
1. Download and verify the image
Grab the vmdk from the Downloads page. On any Linux/macOS host that has ovftool or SSH into an ESXi VM console access:
VER=0.2.1
curl -L -O https://github.com/soctalk/soctalk/releases/download/v$VER/soctalk-demo-$VER.vmdk.xz
curl -L -O https://github.com/soctalk/soctalk/releases/download/v$VER/SHA256SUMS.txt
sha256sum -c SHA256SUMS.txt --ignore-missing   # macOS: shasum -a 256 -c
xz -d soctalk-demo-$VER.vmdk.xz
You now have soctalk-demo-<ver>.vmdk, a streamOptimized (hosted) VMware disk. ESXi's VMFS won't run it directly; §4 converts it once with vmkfstools.
2. Build a cloud-init seed ISO
A small NoCloud seed ISO creates an ops user with your SSH key so you can read the per-boot setup token. If you skip it you can still log in as the build-time ubuntu:packer user (see SSH access), but that credential is in the public source tree, so harden the VM before exposing it. On Linux/macOS:
cat > user-data <<EOF
#cloud-config
users:
  - name: ops
    sudo: ALL=(ALL) NOPASSWD:ALL
    shell: /bin/bash
    ssh_authorized_keys:
      - $(cat ~/.ssh/id_ed25519.pub)
EOF
printf 'instance-id: soctalk-demo\nlocal-hostname: soctalk-demo\n' > meta-data
# Linux: genisoimage / cloud-localds   •   macOS: hdiutil or mkisofs (brew install cdrtools)
genisoimage -output soctalk-seed.iso -volid cidata -joliet -rock user-data meta-data
3. (Optional) Create a VMFS datastore
Skip this step if your ESXi already has a user datastore (e.g. datastore1) with 10+ GB free.
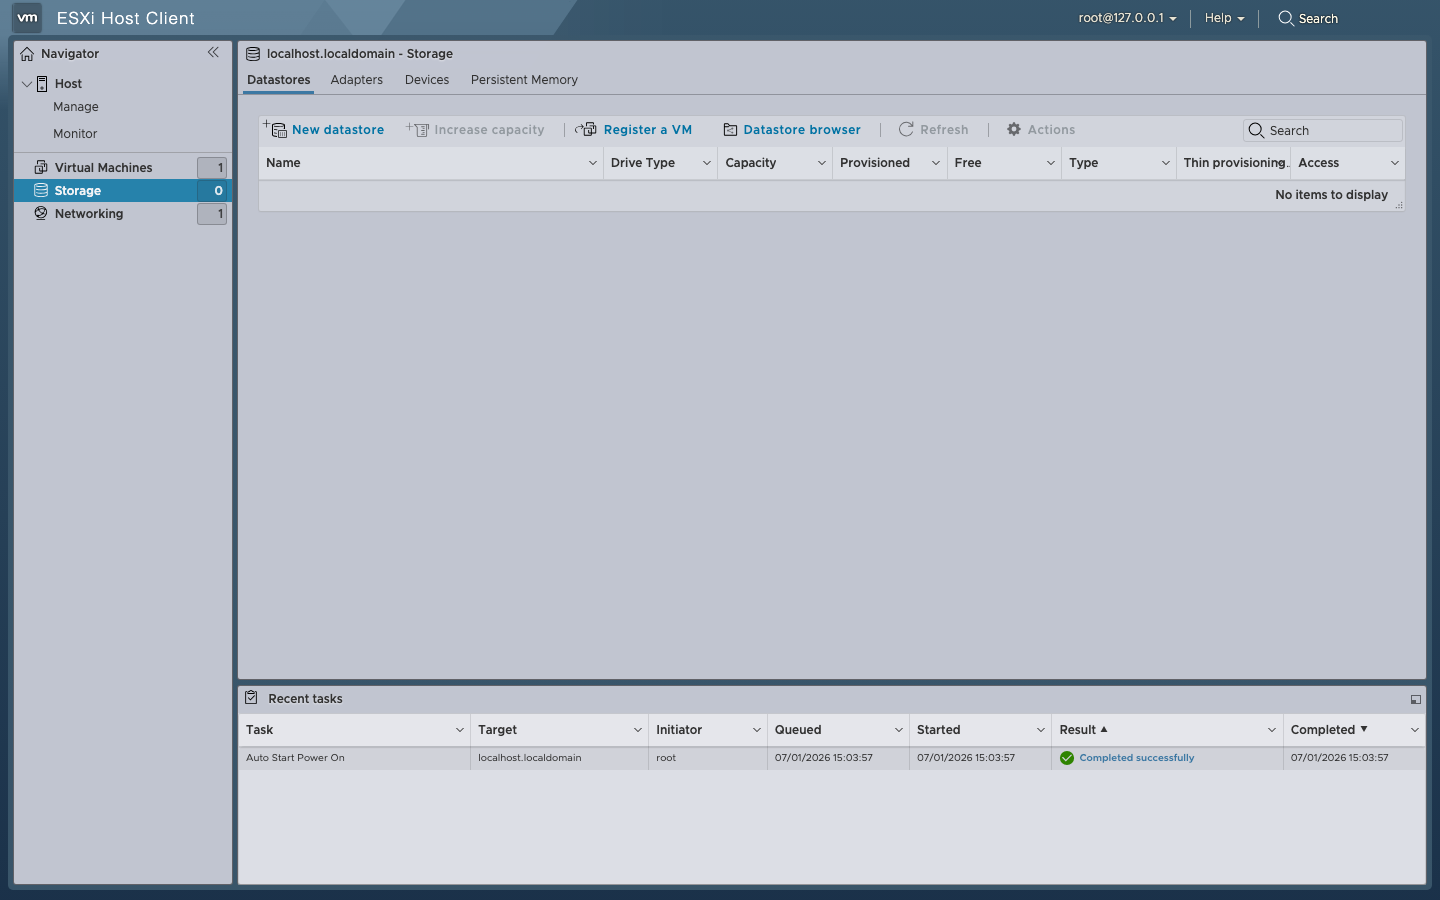
Sign into the Host Client and go to Storage → Datastores. An install that hasn't been given a data disk looks like this:
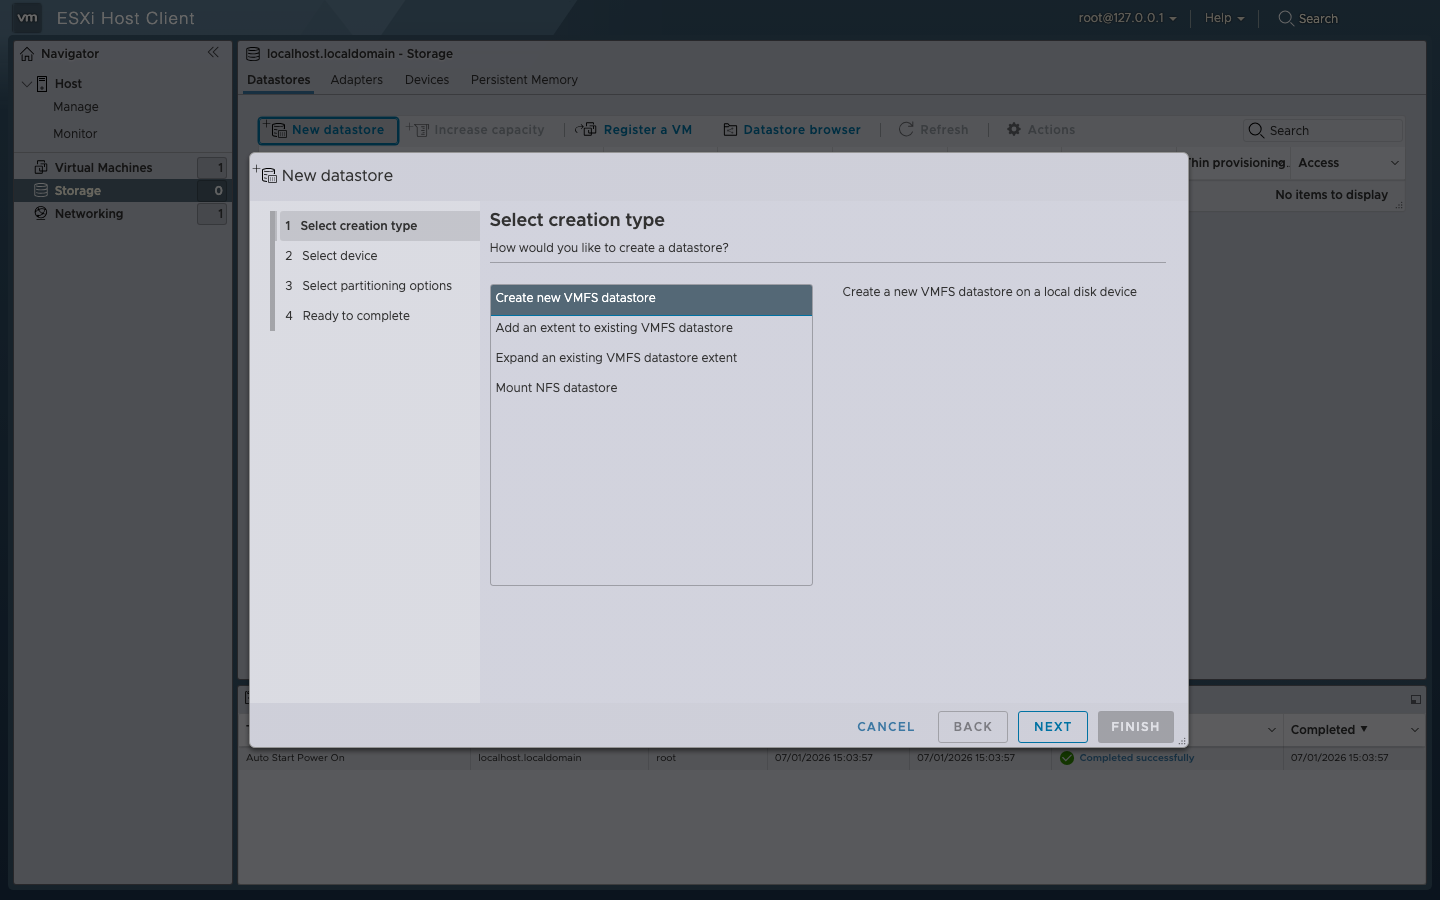
Click New datastore to open the 5-step wizard.
Step 1, Select creation type. Pick Create new VMFS datastore. Next.
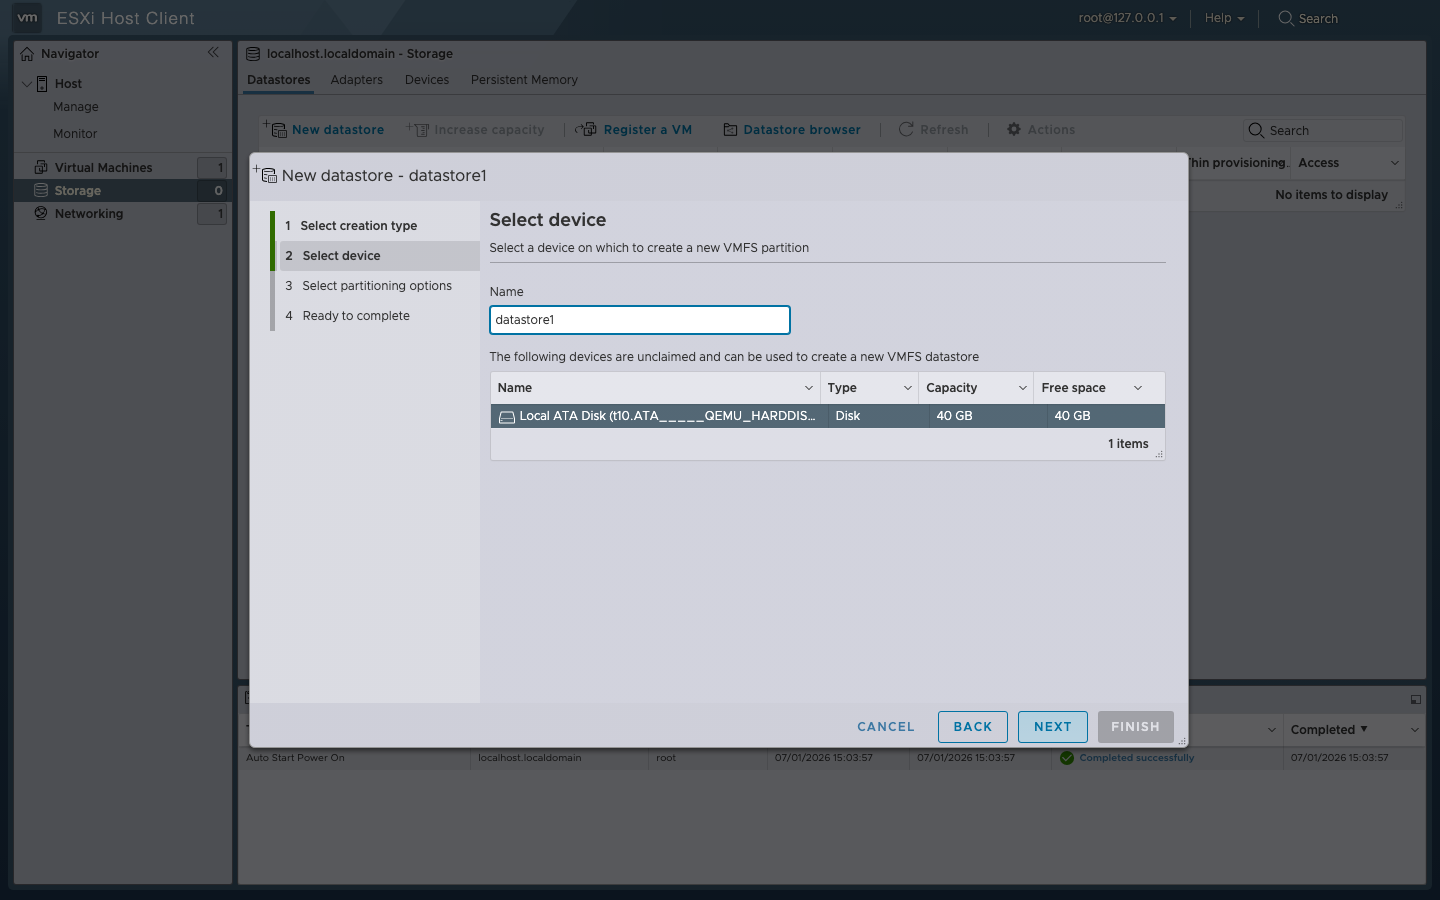
Step 2, Name and select device. Enter a name (datastore1 is conventional) and pick the disk to format. Only unclaimed disks appear here.
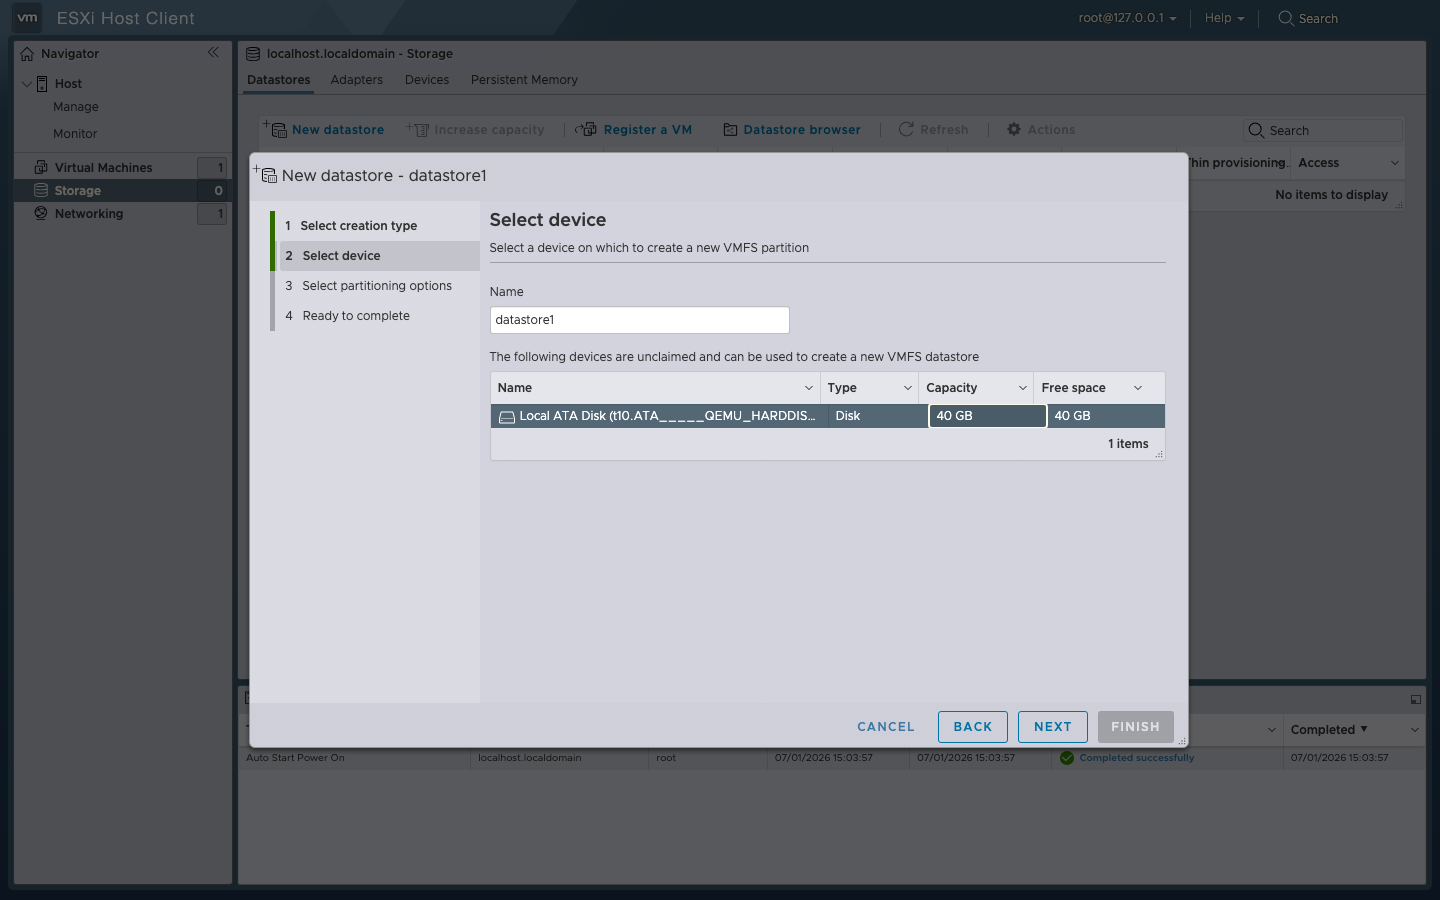
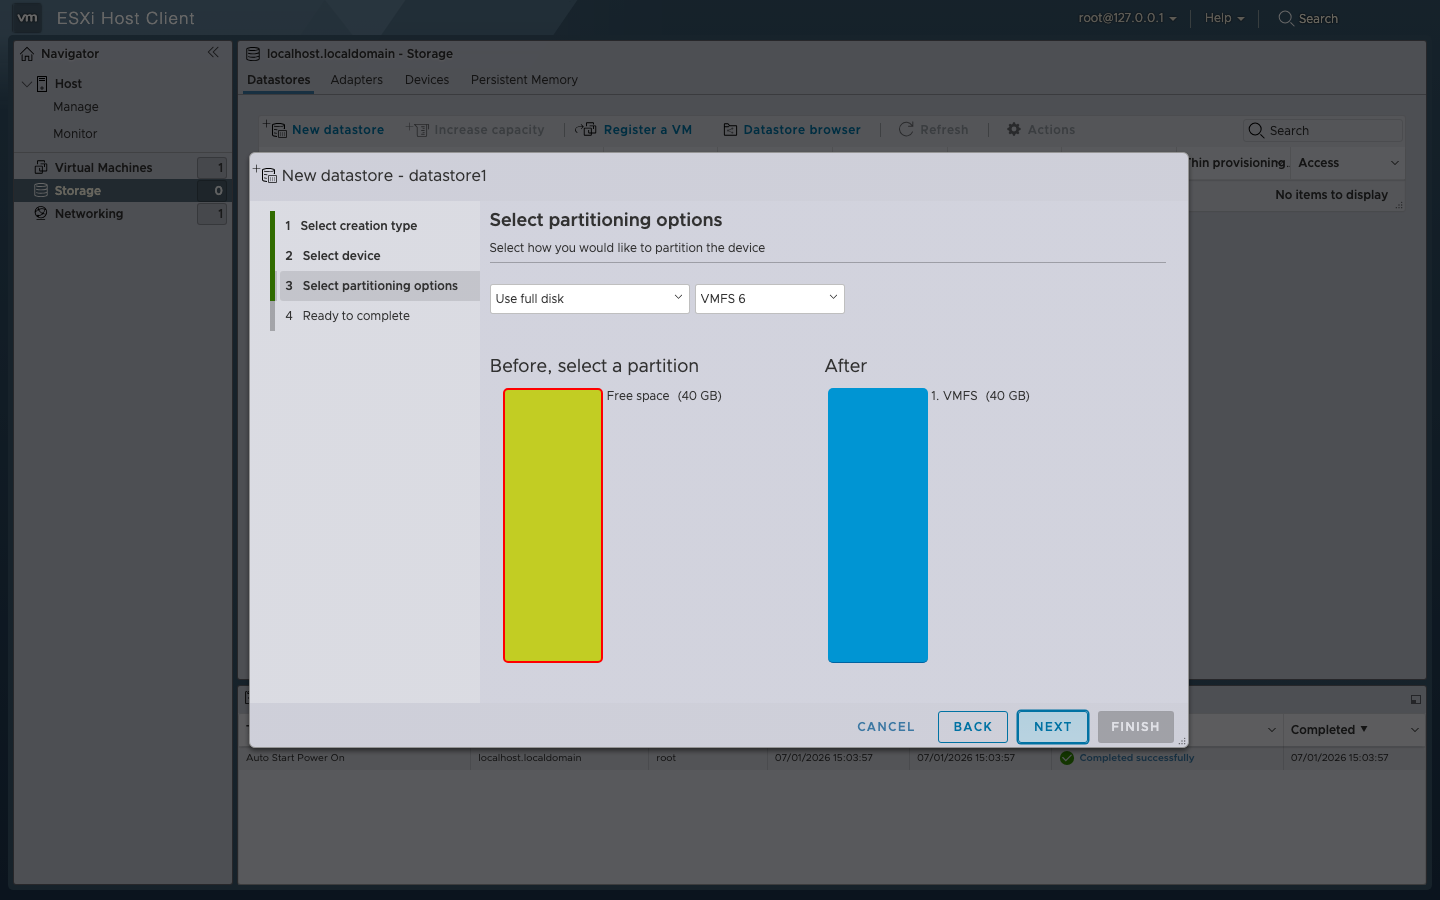
Step 3, Select partitioning options. Default: Use full disk, VMFS 6. Confirm and click Next.
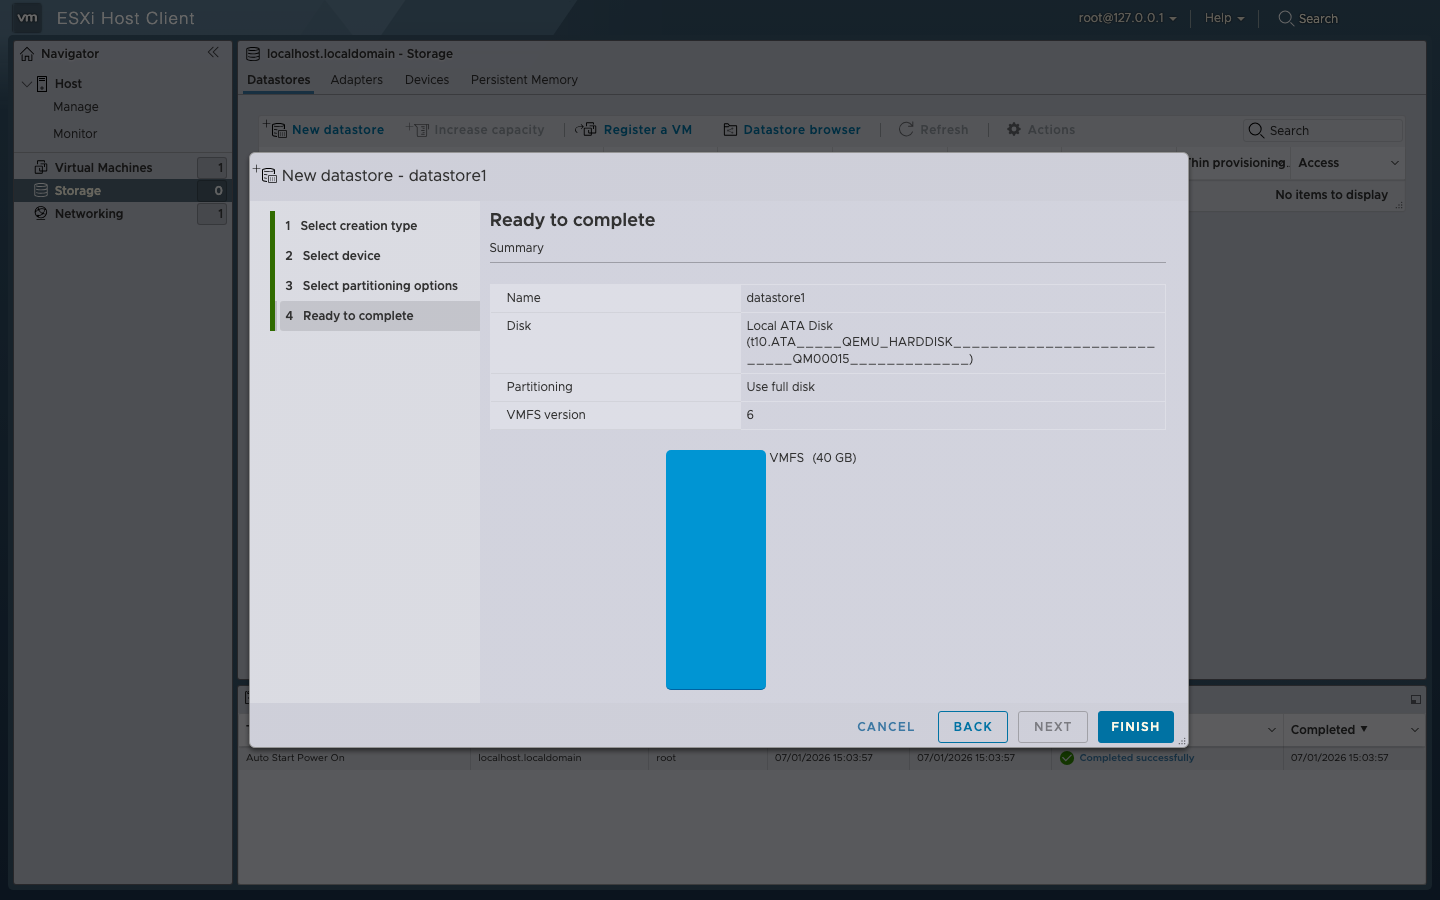
Step 4, Ready to complete. Sanity-check the summary and click Finish. ESXi warns that the disk will be repartitioned; confirm.
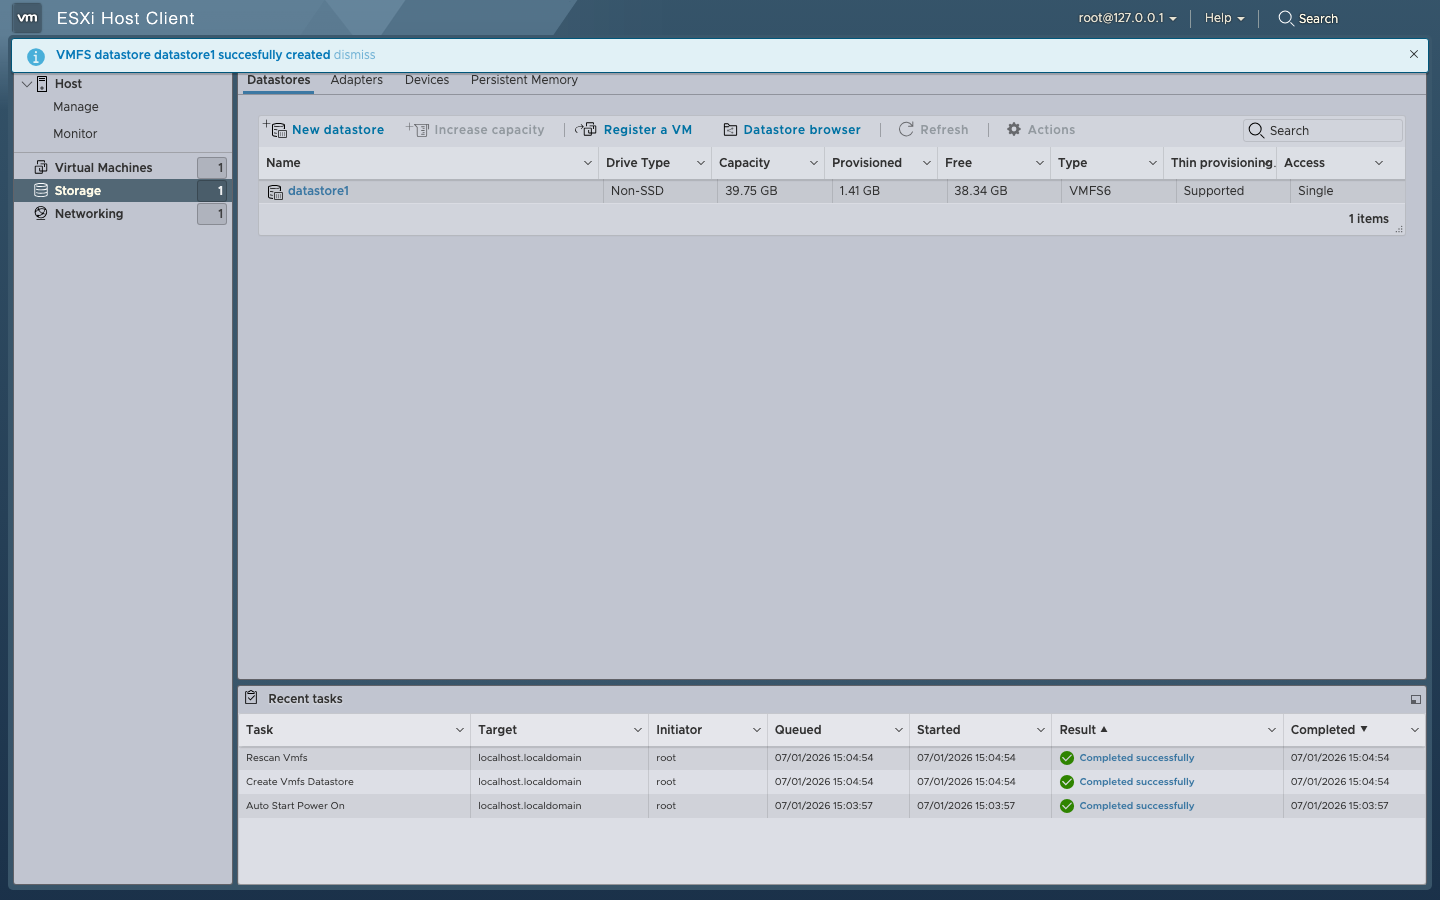
Result. Storage → Datastores now shows the new VMFS6 datastore. Recent tasks reports both Create Vmfs Datastore and Rescan Vmfs completed successfully.
4. Upload and convert the vmdk
The vmdk from GHCR is streamOptimized. ESXi's VM subsystem needs a VMFS thin disk. Two paths:
# Enable SSH on the ESXi host: Host Client → Actions → Services → Enable SSH
# Copy the vmdk to the datastore (from any host that has scp)
DS=/vmfs/volumes/datastore1
scp soctalk-demo-0.2.1.vmdk root@<esxi-host>:$DS/soctalk-source.vmdk

# On the ESXi host: convert to VMFS thin (~1 minute on a fast SSD)
ssh root@<esxi-host>
mkdir -p /vmfs/volumes/datastore1/SocTalk-Demo
vmkfstools -i /vmfs/volumes/datastore1/soctalk-source.vmdk \
           /vmfs/volumes/datastore1/SocTalk-Demo/SocTalk-Demo.vmdk -d thin
rm /vmfs/volumes/datastore1/soctalk-source.vmdk# Wraps the vmdk into a minimal OVF and pushes to ESXi in one command
ovftool --acceptAllEulas --diskMode=thin \
--datastore=datastore1 \
--net:"VM Network"="VM Network" \
--name=SocTalk-Demo \
soctalk-demo-0.2.1.vmdk \
vi://root:<password>@<esxi-host>Also upload the seed ISO via Storage → Datastore browser → Upload:
[datastore1]/SocTalk-Demo/soctalk-seed.iso5. Create the VM
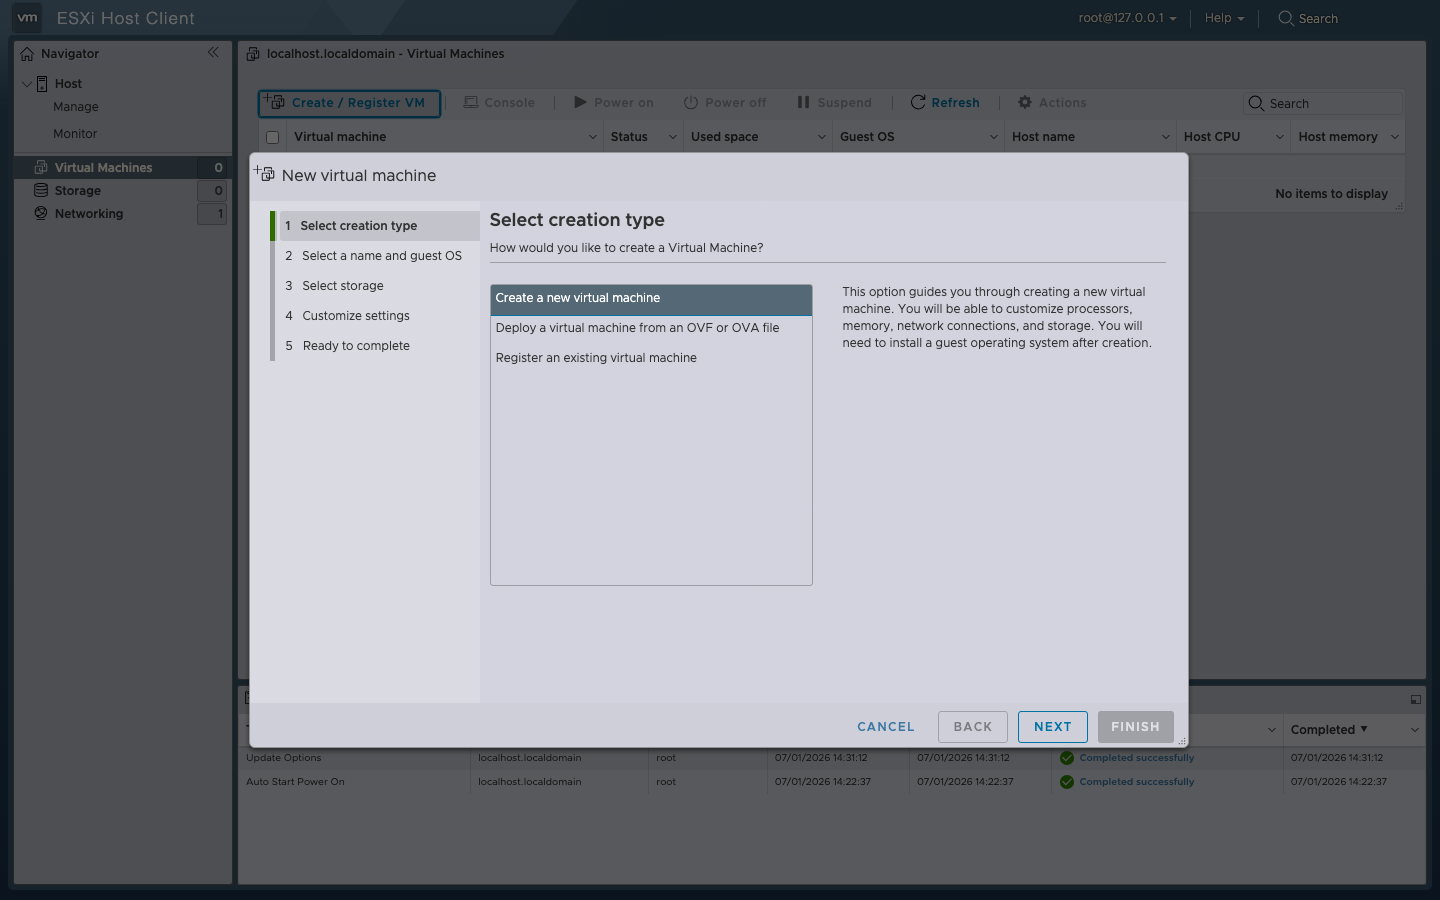
Go to Virtual Machines in the Host Client and click Create / Register VM to open the 5-step wizard.
Walk the wizard:
- Select creation type: Register an existing virtual machine (we already placed the vmdk in step 4).
If your ESXi build hides that option or you prefer to configure everything from the wizard, pick Create a new virtual machine instead and use these settings:
- Select a name and guest OS: Name
SocTalk-Demo. CompatibilityESXi 8.0 virtual machine. Guest OS familyLinux. Guest OS versionUbuntu Linux (64-bit). - Select storage:
datastore1. - Customize settings: set:
- CPU 4
- Memory 8 GB
- Hard disk 1: click the disk row → Existing hard disk, browse to
[datastore1] SocTalk-Demo/SocTalk-Demo.vmdk - Network adapter 1: Network
VM Network, Adapter typeVMXNET3(VMware's recommended paravirtualized NIC; use it on bare-metal ESXi for best performance) - CD/DVD drive 1: Datastore ISO file, browse to
soctalk-seed.iso: check Connect at power on - Leave USB controller and Floppy at their defaults.
- Ready to complete: Finish.
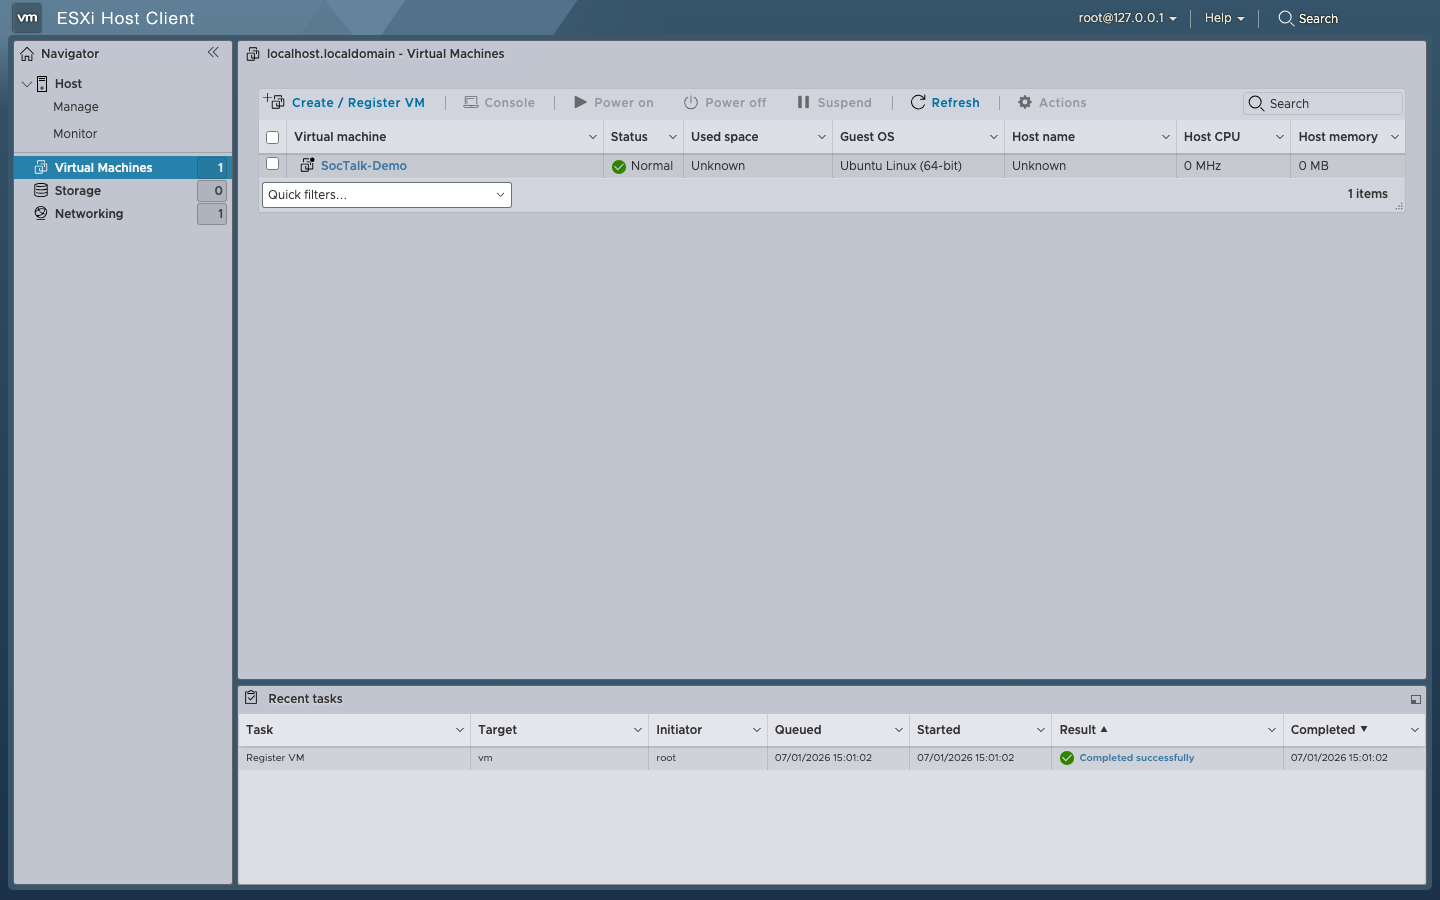
The VM appears in the Virtual Machines list with Register VM marked completed successfully.
6. Power on and open the console
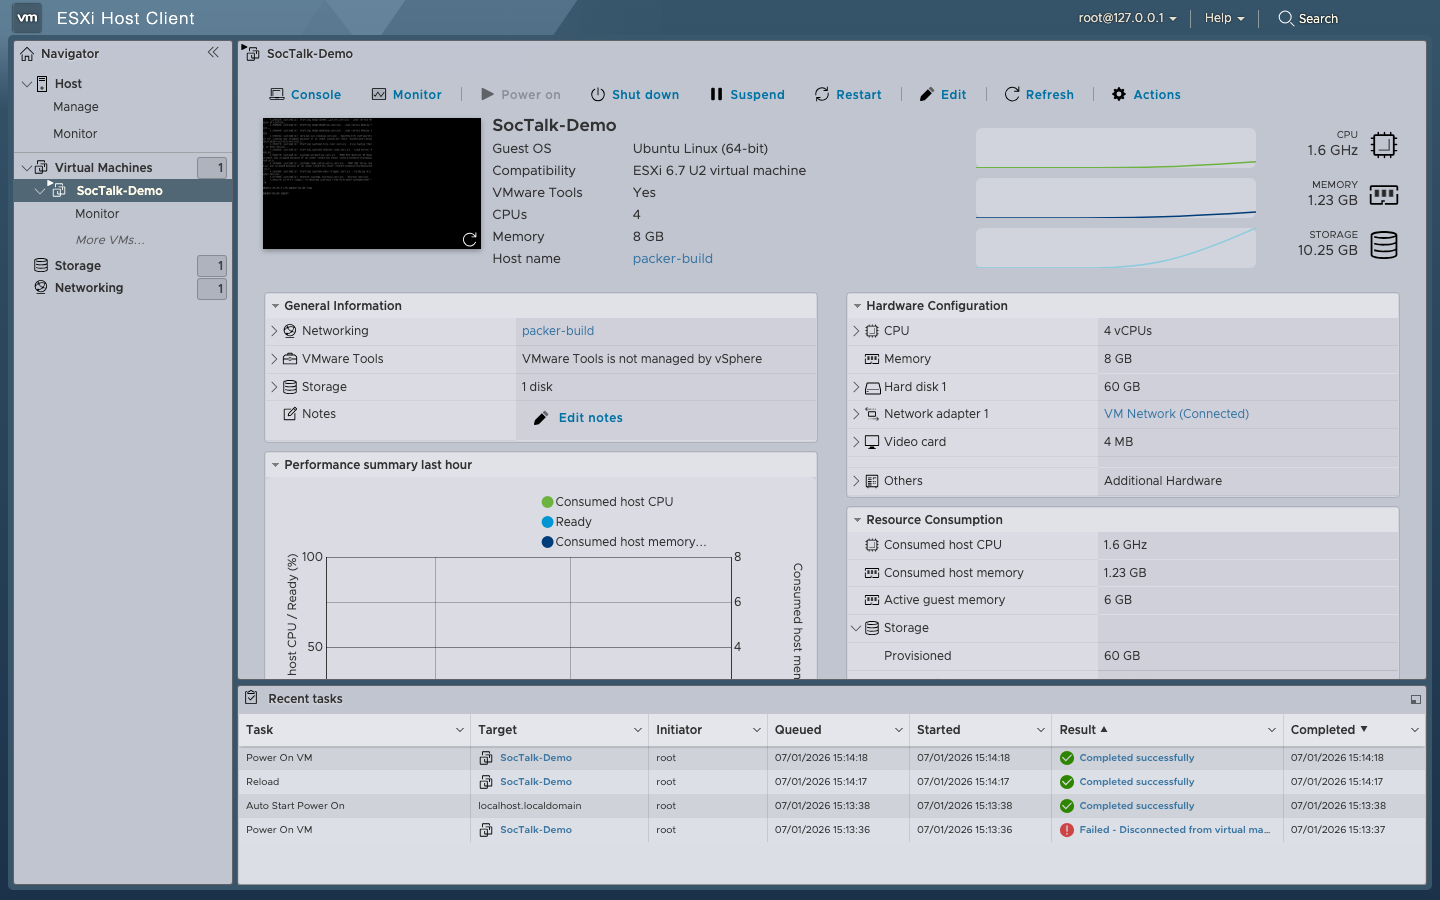
Select SocTalk-Demo and click Power on. The header flips to green power-on state and the console thumbnail starts updating.
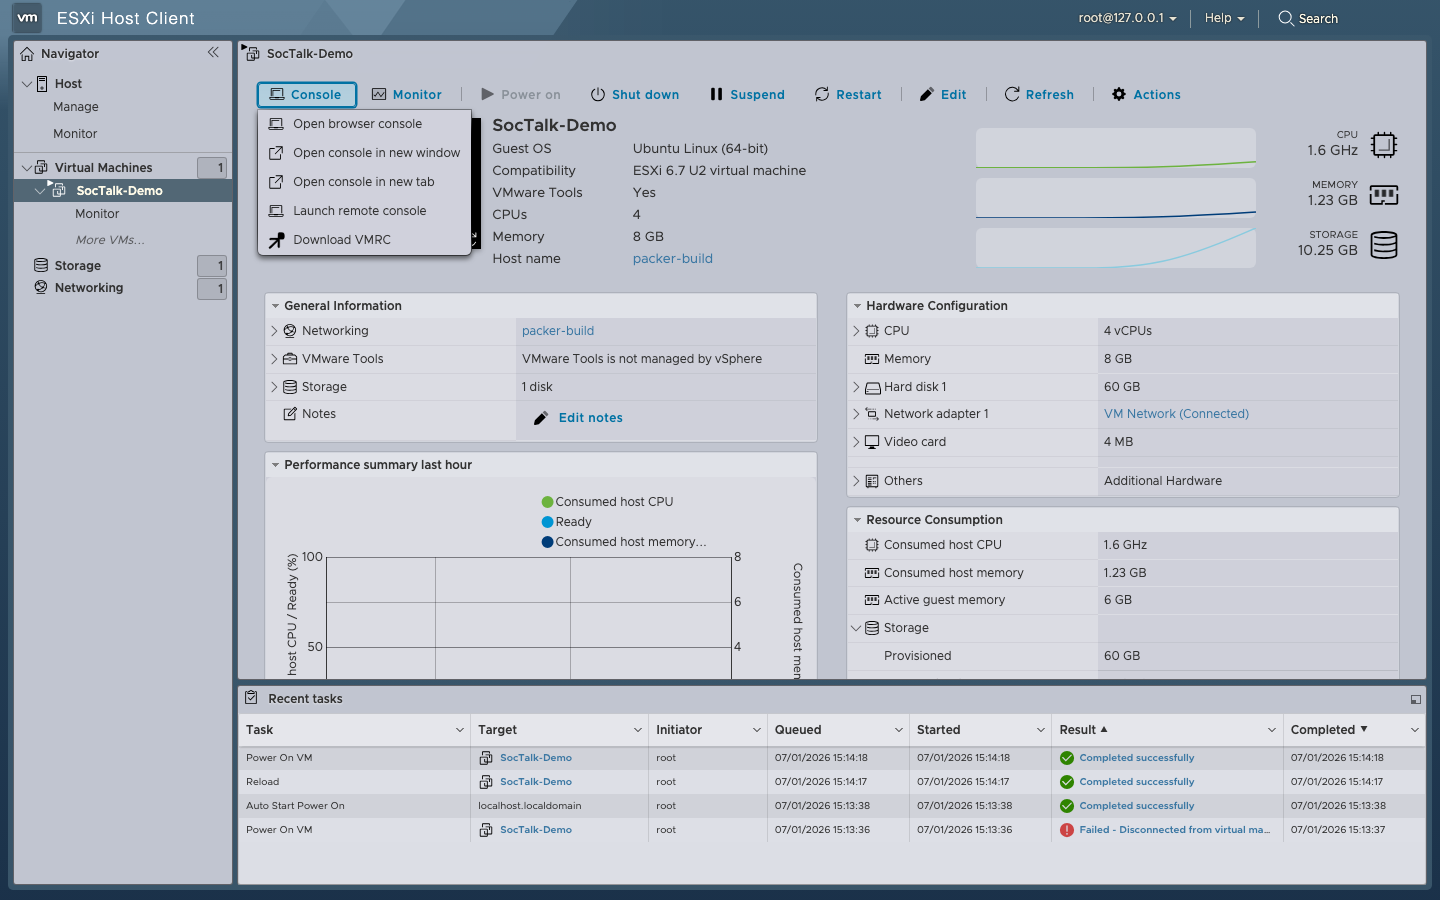
Click Console → Open browser console (the standalone tab is easier to type into than the inline preview).
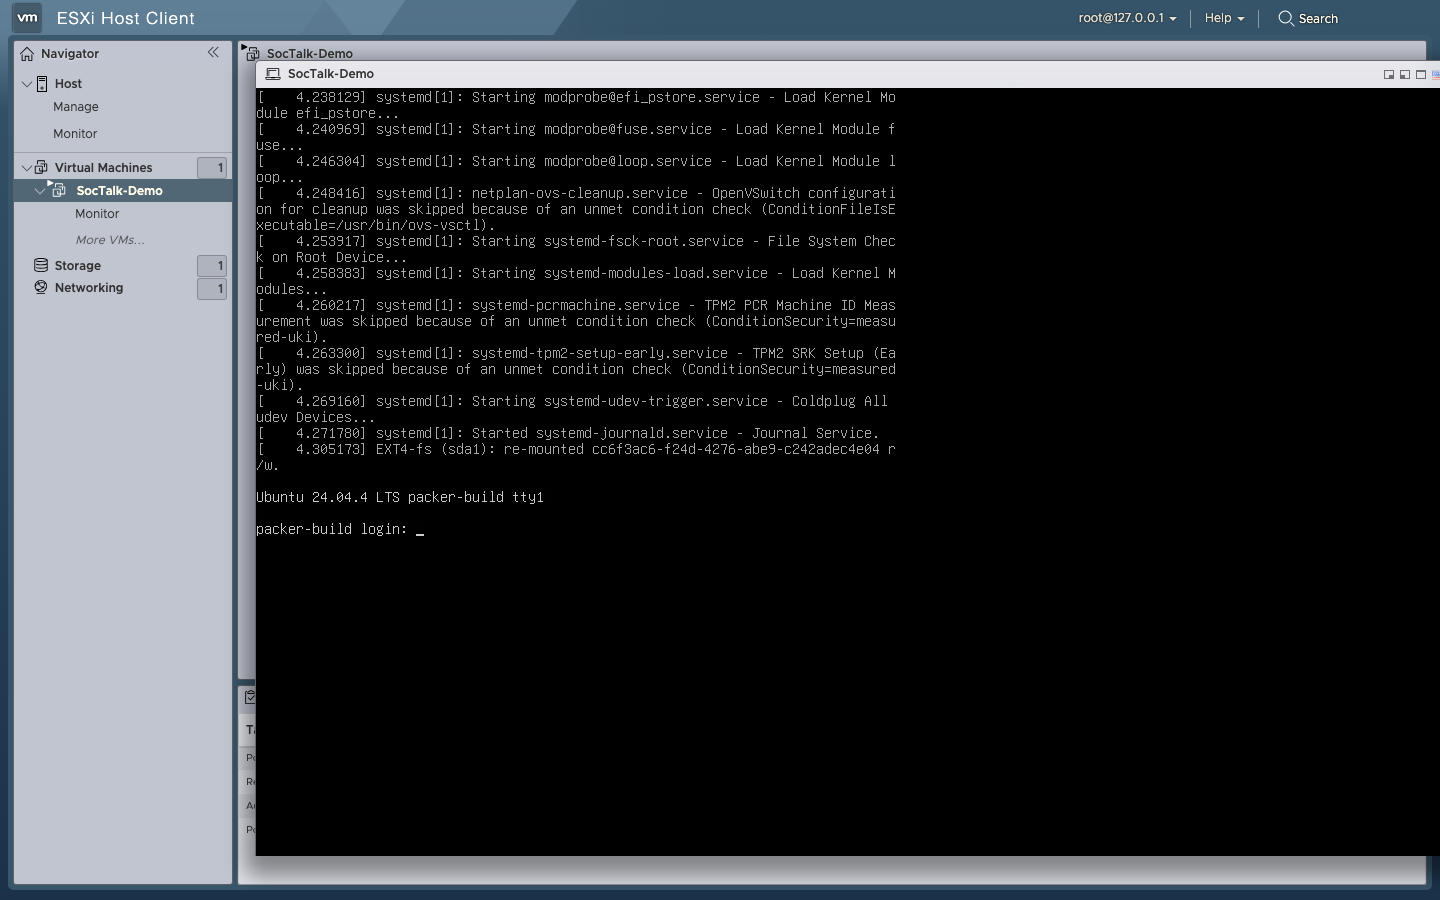
The console shows Ubuntu 24.04 booting through cloud-init and dropping to a login prompt:
7. Log in to the VM
You have two ways in, both of which give you a shell you can sudo -i from to become root.
# From the host whose SSH public key is in the seed ISO you built in §2.
# The VM's IP shows in the Host Client under SocTalk-Demo →
# General information → Networking.
ssh ops@<vm-ip>

# From the ops shell:
sudo -i        # → root shell (NOPASSWD sudo, no password prompt)
whoami # → root# Every published image ships a build-time ``ubuntu`` account with password
# ``packer``. This credential is in the public source tree, so treat it as
# public information; harden or delete the account before exposing the VM.
ssh ubuntu@<vm-ip>
# Password: packer
# From the ubuntu shell:
sudo -i # → root shell (NOPASSWD sudo, no password prompt)# Host Client → SocTalk-Demo → Console → Open browser console
# Same credentials as the SSH tabs above.
packer-build login: ubuntu
Password: packer # not echoed on screen
ubuntu@packer-build:~$ sudo -i
root@packer-build:~#Harden or delete the packer credential before you expose the VM
The ubuntu:packer login is baked into every published image and lives in the public source tree. On any VM that leaves an isolated lab: sudo passwd -l ubuntu (lock the account) plus sudo sed -i 's/^#\?PasswordAuthentication.*/PasswordAuthentication no/' /etc/ssh/sshd_config /etc/ssh/sshd_config.d/*.conf 2>/dev/null && sudo systemctl reload ssh. See SSH access + credentials for the full hardening story.
8. Read the setup token
From the host that owns the SSH private key in the seed ISO:
# Find the VM's IP: Host Client → SocTalk-Demo → General information → Networking
ssh ops@<vm-ip> sudo cat /run/soctalk/setup-token
Copy the token, then open https://<vm-ip>/ in a browser and paste it when the wizard asks. Continue from Quickstart VM step 6.
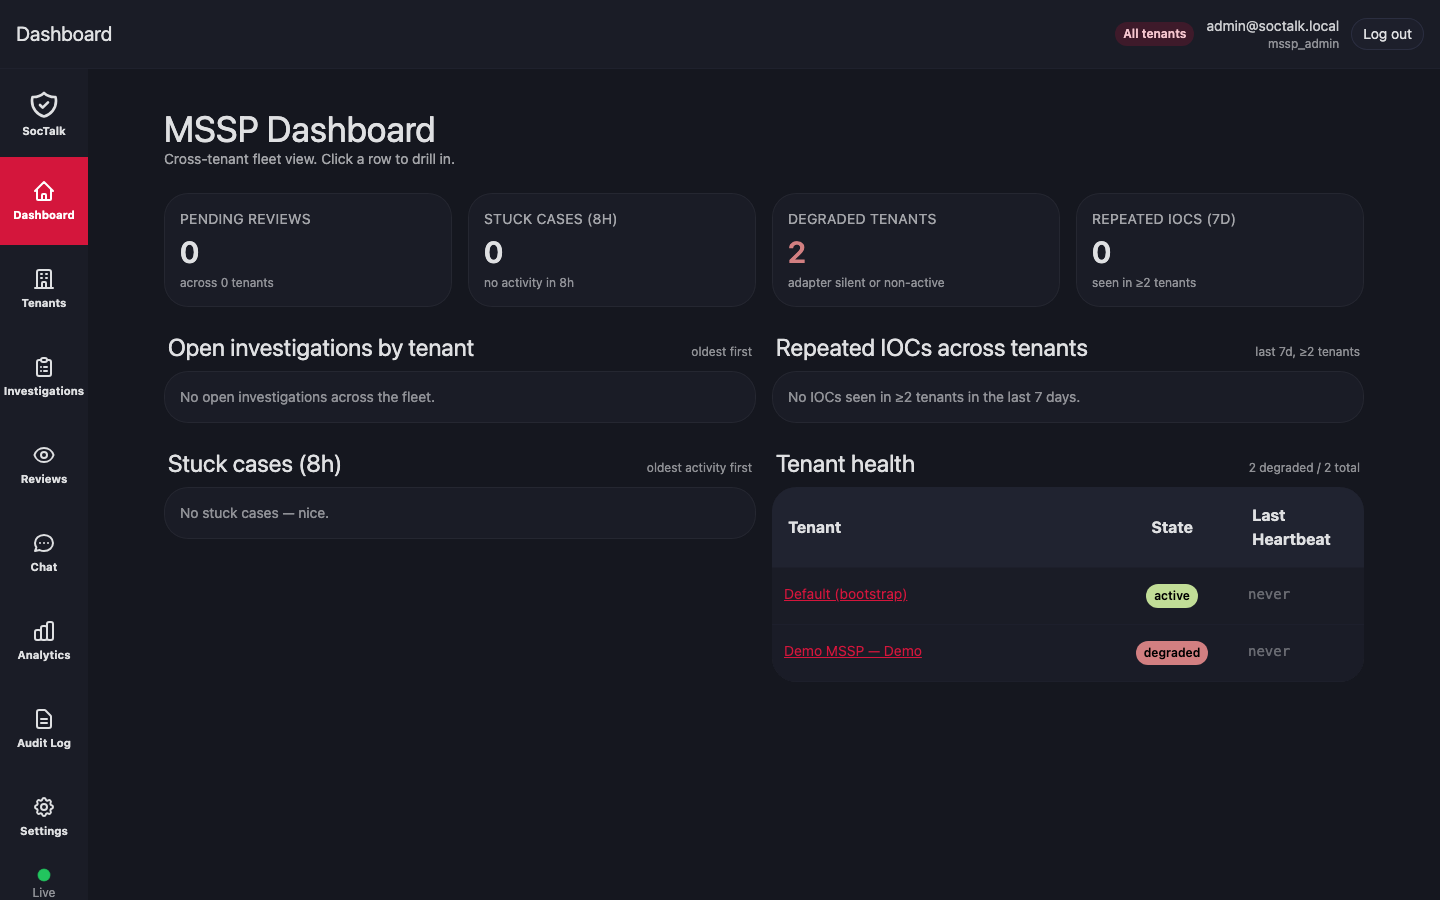
Once install completes you're at the MSSP Dashboard:
Troubleshooting
Entries below apply to real bare-metal ESXi hosts unless they carry a (nested lab only) tag. The tagged ones showed up while validating this guide on nested ESXi (ESXi 8.0.3 as a KVM guest under Ubuntu 24.04) and don't affect production hardware.
msg.vmx.poweron.failed: not on NAS or VMFS version 3 datastore: the VM files live under /vmfs/volumes/OSDATA-* instead of a real user datastore. Move them: vmkfstools -i the vmdk into a real VMFS datastore (§3 + §4), copy the .vmx alongside, unregister the old VM (vim-cmd vmsvc/unregister <id>), and register the new one (vim-cmd solo/registervm /vmfs/volumes/datastore1/SocTalk-Demo/SocTalk-Demo.vmx SocTalk-Demo).
VM boots but the network interface is DOWN and never picks up an IP: the packer image ships a netplan config that matches by MAC. When ESXi assigns a new MAC to the vNIC, the match fails and DHCP never runs. Fix by editing /etc/netplan/50-cloud-init.yaml to match by interface name instead:
network:
  version: 2
  ethernets:
    all:
      match:
        name: "en*"
      dhcp4: true
Then netplan apply.
ovftool: error while loading shared libraries: libssl.so.1.1: install a compatible OpenSSL 1.1 runtime, or use the SSH + vmkfstools path instead.
Host Client shows a red banner about the ESXi Shell / SSH being enabled: expected in evaluation setups. It's a hardening reminder, not an error. Disable SSH after you're done if the host is exposed.
Nested-lab only
These show up when ESXi itself is running as a guest inside another hypervisor (KVM, VirtualBox, Fusion, Workstation, or a cloud "bare-metal-lite" instance). On real bare-metal ESXi you won't see any of them; the defaults from §5 (VMXNET3 NIC, hardware version 20, USB + Floppy enabled) work as-is.
Power on fails with E1000PCI: failed to register e1000e device or Vmxnet3 PCI: failed to reserve slot (nested lab only): the outer hypervisor doesn't emulate enough PCIe topology for ESXi to allocate a slot for the paravirtualized NIC. Edit SocTalk-Demo.vmx and set ethernet0.virtualDev = "e1000" (the classic emulated NIC, which needs less), then vim-cmd vmsvc/reload <id> and power on again. On real hardware, keep VMXNET3.
vmx segfaults with signal 11 / msg.vmx.poweron.failed on hardware version 20 (nested lab only): some outer hypervisors don't advertise the newer PCIe/EPT features that vmx-20 assumes. Edit SocTalk-Demo.vmx and drop to virtualHW.version = "15", remove usb.present = "TRUE" and floppy0.present = "TRUE" (or set both to "FALSE"), then vim-cmd vmsvc/reload <id> and try again. Real bare-metal ESXi runs vmx-20 fine.